As an interior designer, there are few things that make me cringe harder than a tacky travel souvenir. On the other hand, as a passionate traveler, I understand the burning desire to buy said tacky travel souvenir.
Vagabondish is reader-supported. When you buy through links on our site, we may earn a small affiliate commission. Read our disclosure.
With a bit of pre-trip planning, some careful shopping during your explorations, and an afternoon at the craft table, you can have travel souvenirs that you will be proud to display. Here I round up my favorite travel inspired décor tips for every budget and every level of crafting ability.
Maps
I’ve always had a passion — borderline obsession — for studying maps. I’m that girl with a collection of every cheesy tourist map from all of my getaways, though they are stashed away in a box somewhere. These brightly colored, cartoony maps definitely do not make for good interior design.
Luckily there are countless ways to decorate with maps that can add sophistication to your space while holding onto the memories of that incredible getaway!
#1: United States of Us
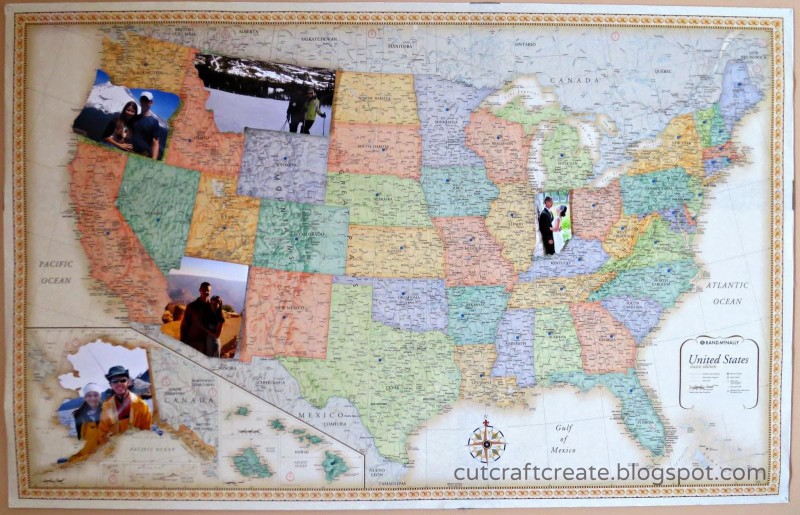
I fell in love with this idea the moment I saw it. It’s super personal and the best part is that you don’t have to spend money on cheap trinkets that you really don’t like much anyway.
How To: Kelsie has a thorough step-by-step guide on how she created the map seen above and it’s a pretty straight forward process. Check out the full tutorial here.
Craftiness Required: Medium. You need to be confidant in your X-Acto knife abilities!
Cost: Low. Just the cost of a simple map, some foam core, push pins, and glue.
#2: Vintage Flair
Nothing says sophisticated design like a vintage map of a world famous city like London, Paris, or New York. It’s such a popular trend right now that even non-travelers are getting on board. So how do you personalize a trend? By channeling the OCD traveler in you and mapping your route of course!
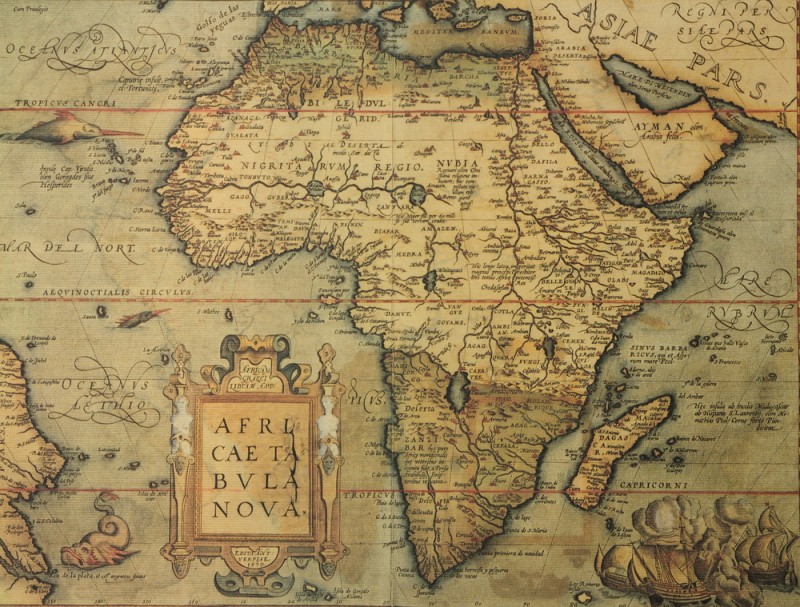
At the end of your trip, you’ll have a fully personalized vintage map and a perfect way to remember all of your stops from a jammed packed vacation. You can even take this one step further and go over your mapped-out route with pins and string.
How To: The minute you land in your destination (or if you are a super planner, before you ever leave home), buy a vintage style map of the city. From there just start marking your adventures right on the map, including the streets you explore and restaurants you discover.
Craftiness Required: Low. You just need the ability to trace some lines!
Cost: Low. You probably already have a marker, pins, and string hanging around. It’s just a matter of finding the right map.
Travel Trunks

This is a design trend that’s here to stay and for good reason! A vintage travel trunk adds tons of character and interest to your space. We’ve all seen the classic travel trunk as a coffee table, but thanks to inspiration from the web, people are getting very creative with ways to use and display their vintage luggage.
#3: Suitcase Shelves
Not everyone collects luggage *while* traveling, but it can be a fun item to hunt for during a weekend road trip. I’m lucky enough to live in New England where there are as many antique shops as there are Dunkin Donuts. Short trips usually mean your car isn’t packed to the brim with your actual luggage so you probably have the room to bring home a vintage suitcase or two.
© Flea Market Style Magazine
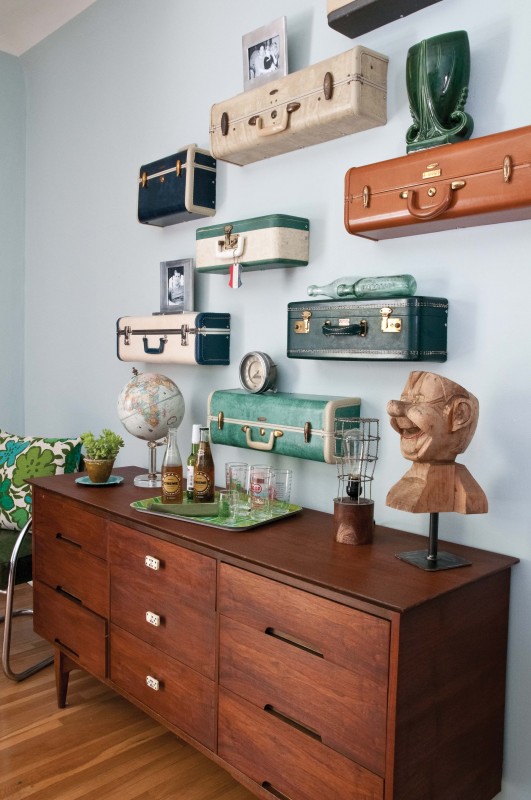
Stacked suitcases as an entry table is a clever idea, but why not turn your thrift shop find into an unusual, and stylish, display shelf!
How To: Upcycle That has a complete tutorial.
Craftiness Required: High. Not everyone is confident using a table saw, so don’t be afraid to ask for help on this one!
Cost: Moderate. I’ve seen vintage luggage from as low as $30 to as high as $300 per piece. Look for sturdy pieces over “pretty” pieces. The bumps and dings are what add interest (and bring the cost way down!)
Postcards
Here is where I also admit to being a lover of really cheesy postcards. Yes, I break all of my own souvenir rules. I think something just happens to our brains when we go away and every tourist trap tchotchke suddenly seems like a great find.
Lucky for me (and you!), bad postcards can be a great find, if you know what to do with them once you get home.
#4: Message in a Bottle
These memory jars are great for a lot of reasons: they are inexpensive, they make beautiful personalized displays, and best of all, they are family-friendly. If you have children they will love hunting for souvenirs to add to the jar.
This is also your chance to actually go ahead and buy that really terrible travel trinket. In this case, the cheesier the better!
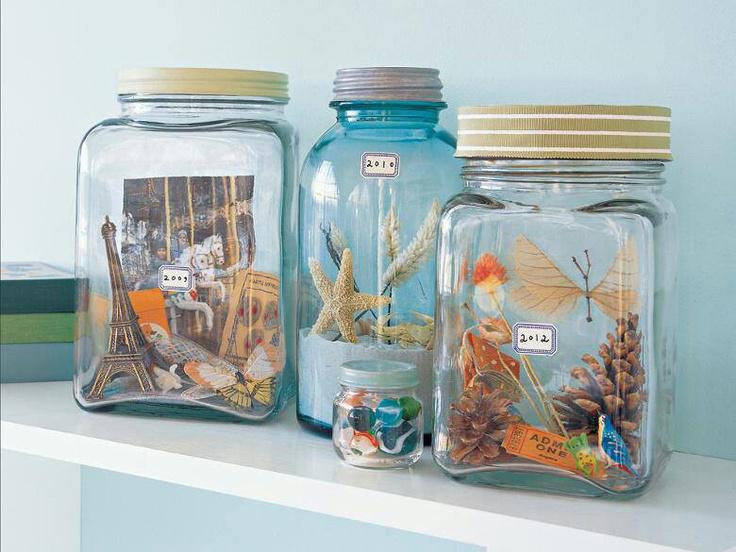
© MarthaStewart.com
How To: On the back of the postcard, write a few notes about the dates of your trip, the sights you saw, the food you tasted, etc. Place that in the back of a large mason jar and go to town filling it with items from your trip: sand, pine cones, rocks, ticket stubs, whatever! Best way to display them: on a travel trunk shelf of course!
Craftiness Required: None! This is an incredibly easy, family-friendly project that anyone can do.
Cost: Low. You just need a mason jar, a cheap postcard, and one or two standard souvenirs; the rest of the jar can be filled with “found” items from your getaway.
#5: Postcard Art Gallery
Here’s yet another super simple yet clever idea for decorating with all of those really terrible postcards you’ve collected over the years. Turn them into a stylish mini art gallery.
This idea is great because it can fit any décor. From the upscale style, with framed, carefully hung postcard art …
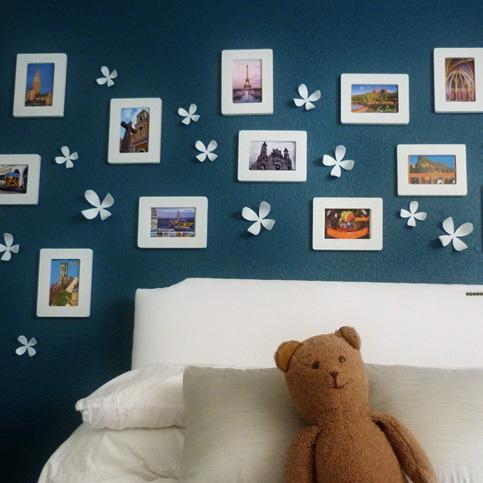
… to the casual, fun style of a string and clothespin display:

… you can incorporate those otherwise terrible postcards into your space in a way that stands out, but for all the right reasons.
How To: For any art gallery display, I recommend laying it all out first. Arrange all of the pieces on the floor the way you want them on the wall. This way you can figure out how it will look before you begin putting holes in the wall!
You should do this even if you’re going for the string and clothespin display. It will provide a good sense of how things should be laid out and how many rows of string you will need.
Craftiness Required: Low. I think everyone knows how to hang a picture, right?
Cost: Low to Medium. Postcards are great because they are super cheap! The big cost lies in the frames (if you choose to go that route). Best bet: thrifted frames, they are trendy and will keep the cost way down.
DIY Furniture
#6: Coffee Table Book Table
When I travel to an exotic location, I want a million pictures to remember all of the incredible sites I’ve seen. However, a photographer I am not. This is where a coffee table book comes in! Beautifully laid out, with shots that I’d never be able to get on my own, they are a wonderful way to recall the amazing sights you visited on your trip.
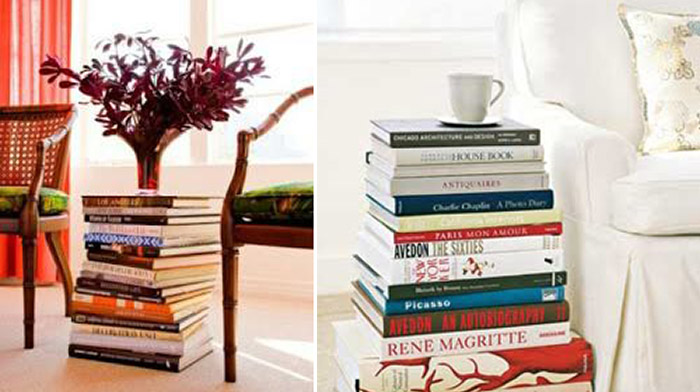
© Real Simple
The problem arises when you go on countless adventures and your coffee table quickly becomes overcrowded. So why not turn your books into the table? Stacking books to create a side table is quickly catching on as a clever way to display books that are special to you, but that you won’t be looking through on a daily basis.
How To: You don’t really need a tutorial on this one, so I’ll just give a helpful design tip: Keep in mind the colors of the jackets. Don’t place too many similar colors together as this creates a block of color that will visually distract from the overall look.
Craftiness Required: None. Seriously, it’s just a stack of books.
Cost: Probably high (coffee table books aren’t cheap!). But if it’s what you like to collect anyway, you might as well have a fun way to display them!


