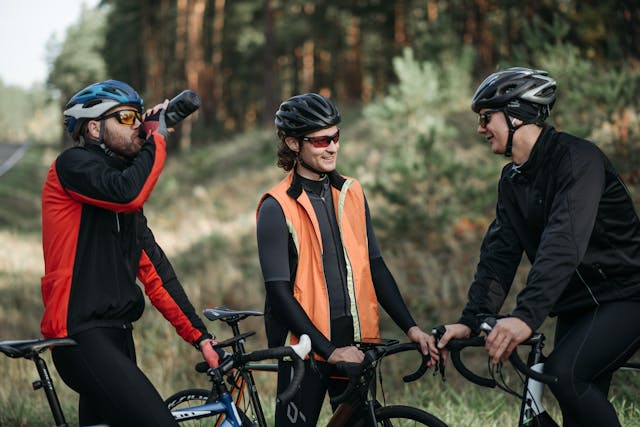
Ever dreamed of riding world-class trails somewhere far from home?
Vagabondish is reader-supported. When you buy through links on our site, we may earn a small affiliate commission. Read our disclosure.
Fresh dirt on your tires in a new location is the best. New views. New obstacles. New tales to spin.
But here’s the catch…
Transporting your bike safely is an entirely different story. Imagine this. You plan the trip of a lifetime. You land in your exotic destination and open your bike case to discover a cracked frame.
That nightmare is more common than most riders think.
And riders are doing it more frequently than ever. Mountain biking is huge right now. To give you an idea, over 9.2 million people rode off-road during one recent year. That’s 4.1% higher than the previous year. More mountain bikers means more hauling your bike around to ride the best trails.
The good news?
When you pack smart, you’ll arrive set up and ready to ride. It starts with how you pack your bike.
The reality is that bikes often do not arrive in one piece. Many of the best mountain bikes for trails can withstand some pretty rough treatment while traveling so shop the best mountain bikes before your next adventure and choose a frame that will conquer both the drive and the trails ahead.
Here’s What’s Coming Up:
- Know Before You Fly
- Picking The Right Bike Case
- How To Pack Your Bike The Smart Way
- The Gear You Can’t Forget
- Protecting Your Investment
Know Before You Fly
First thing’s first, know how airlines handle bikes. Each and every airline has their own policy.
And those rules can get pricey…
Airline bike fees can cost you anywhere from $40 to $350 per leg of your journey. That’s a pretty wide range based on which carrier you choose. Some consider your bike to just be another checked bag. Others charge excessive fees for “sports equipment” that will blow your budget right out of the airport.
Here’s what you need to keep in mind:
- Weight limits usually sit between 50 and 70 pounds
- Size limits are often capped around 115 linear inches
- Booking early can save you money and guarantee your bike a spot
Do your research before you purchase. Researching only two or three airlines may save you hundreds of dollars. Wouldn’t you rather spend that money on lift tickets and tacos at the trailhead?
Picking The Right Bike Case
Your bike box is the most important travel accessory you will ever purchase. It is the armour for your bike.
There are two main types to choose from.
Hard cases provide protection like none other. They can withstand almost anything a baggage handler can dish out. They are heavy, however, and expensive.
Soft cases. Lighter and way easier to stash once you arrive. They aren’t quite as protective as a hard shell, but are a great compromise for the average rider.
Pick whichever one you like, but make sure it fits your bike correctly. Too large of a case will allow your frame to rattle around inside. Too small of a case won’t close at all.
Pretty important, right?
How To Pack Your Bike The Smart Way
Now to the part everyone dreads… Actually packing the bike.
Relax. It’s a lot simpler than you think when you know what to do. Just take it one step at a time through these steps:
- Remove the pedals and wrap them in foam
- Turn the handlebars sideways or take them off completely
- Let some air out of your tires
- Take the wheels off and pad them well
- Cushion the frame with foam tubing or rolled towels
Golden rule? Wrap everything. If two parts can touch, something should be in between to protect them. That’s the only way to avoid scratches, dings, and broken pieces.
Snap a few photos as you go, too.
That way you will recall how everything goes back together when you make it to the other side. Have faith in the process and your bike will reward you.
The Gear You Can’t Forget
Your bike is packed. But you’re only halfway done.
The little stuff matters just as much as the big stuff…
Miss one little thing and your entire adventure could unravel. Here’s the kit every travelling rider should include before heading out the door:
- Helmet — never check this, keep it close to you
- Pedals and tools — the basics you need to reassemble
- Spare tubes and a pump — because flats happen anywhere
- Riding kit — shoes, gloves, and padded shorts
Smart packers always keep their tools and helmet in their carry-on. Why?
Why? Because if your suitcase gets lost you can rent a bike when you arrive and bring your pedals and helmet with you. Totally changes the game when your airline loses your bag going to the mountains.
Protecting Your Investment
Here’s something most riders only learn the hard way…
Your bicycle is a major investment. Security should continue after the case is zipped up.
A few simple habits go a very long way:
- Snap photos of your bike before the trip to document its condition
- Add a “fragile” sticker to your case so handlers take extra care
- Check your travel insurance to see if your bike is actually covered
- Loosen anything that could snap under pressure during the flight
They take just seconds and they won’t cost you anything. Except maybe a few minutes of your time. But they might prevent tragic heartbreak at the luggage carousel.
The best mountain bikes for trails go through so much abuse, they deserve to arrive ready to shred!
Bringing It All Together
Cycling destinations allow you to explore trails you otherwise would not get to. Descending rocky mountains. Flowing through forest singletrack. You really can make the world your playground.
But it only works if you pack smart.
Let’s quickly recap everything:
- Check airline rules and fees before you book
- Invest in a quality case that fits your bike
- Pad every part and pack in the right order
- Keep your helmet and tools in your carry-on
- Document and protect your investment
None of this is complex. It simply requires a bit of forethought and a bit of patience.
Next time you feel that craving for adventure you’ll know how to transport your bike safely from your front door to the trailhead. Pack properly, ride aggressively, and hunt down those trails.